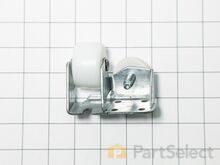
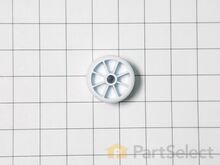
Amana Refrigerator Wheels and Rollers

Amana Appliance Parts

Popular Amana Refrigerator Wheels and Rollers

Your Price
$51.18
  In Stock
Amana Refrigerator Single Roller - Right Front
PartSelect Number PS11755875
Manufacturer Part Number WPW10515762
Sold individually.
Your Price
$51.66
  In Stock
Amana Refrigerator Single Roller - Left Front
★★★★★
★★★★★
3 Reviews
PartSelect Number PS11755876
Manufacturer Part Number WPW10515763
Sold individually.
Installation Instructions
Daniel from BOCA RATON, FL
Original bracket foot brake screw hole was stripped and foot brake would not extend
The repair seemed simple, I just needed to remove the old bracket -- 4 screws -- and slip the new one on.

The tricky bit is that the roller bracket holds the weight of the fridge. So in order to make sure that the fridge did not fall over, and to keep the installation point off the ground so that I could align the screw holes, I needed to shim up the side of the fridge that I was working on.

To tap in the shims, I used a hammer and a spare chunk of wood. I ultimately used 3 shims, and kept tapping until the roller wheel could roll freely. Then I knew that the fridge was high enough. After that, it was pretty easy to remove the 4 screws, align the new bracket, and replace the screws. After that, in order to get the shims out I could just extend the foot brake as it was designed, and that lifted the fridge enough for me to easily slide out the shims. After that I just had to level out the fridge by adjusting the two feet.
Read more...
Your Price
$9.54
  In Stock
Amana Refrigerator Single Roller
★★★★★
★★★★★
1 Review
PartSelect Number PS11738235
Manufacturer Part Number WP10450603
This wheel is sold individually. It is located on the bottom of the refrigerator.
Installation Instructions
mike from holly springs, NC
Left front plastic wheel was broken
Pop loose the plastic grate at the bottom.

Locate and remove the wheel leveling screw from the front bottom corner.

Remove cotter pin from the pin that mounts the wheel assembly to the refrigerator. Tap out the mounting pin.

Lift out the wheel assembly.

Remove the Roller pin from the wheel assembly. I used a Dremel tool with a cutting disk. A hack saw will also probably work.

Install the new roller pin and wheel into the wheel assembly. Use a hammer or vice to peen over the end of the roller pin.

Reinstall and adjust wheel assembly.
Read more...
Your Price
$34.58
  In Stock
Amana Refrigerator Front Roller
★★★★★
★★★★★
4 Reviews
PartSelect Number PS11738962
Manufacturer Part Number WP2166108
Sold individually. Hardware not included. Roller only.
Installation Instructions
Tony from Chicago, IL
Right front wheel broke
Definatly a two man job. I suggest you put a pad down to protect your floor. Remove the filter, grill, and bolts per instructions. Everything is straight forward. Move the frame back 1/2 to 1 inch then tilt the frig back on it's side about 4 inches. If the frame doesn't drop down, move it back until the front of the frame comes of the front lip of the frig. Place a block under the frig lip NOT the frame and WATCH YOUR FINGERS. The wheel should be hanging down. Just pull out the pin, replace the wheel (make sure you have it facing the correct way) and tilt back and pull the blocks. Move the frig back in place and replace the bolts. Took me and a buddy less than 30 minutes. Read more...
Your Price
$90.60
  In Stock
Amana Refrigerator Front Roller Kit
★★★★★
★★★★★
3 Reviews
PartSelect Number PS370711
Manufacturer Part Number 4386774
Support wheel assembly with bracket. Kit of 2.
Installation Instructions
Jeff from Midway, GA
Front wheel was broken when moving refrigerator
Lifted the front up onto a scrap 2x4 to get it off the ground and it had 1 bolt that you removed to get the old item off and replace with new assymbly and 1 bolt to re attach. This sat broke for over a year becuase I thought it would be alot harder to fix, found the part on parts select ordered it recieved it in approx 2 days and had it fixed in less than 15 minutes. I would recommend parts select to anyone who told me that they had a appliance broken.
Thanks
Read more...
Your Price
$33.12
  In Stock
Amana Refrigerator Rear Roller
PartSelect Number PS11751112
Manufacturer Part Number WPW10250570
Sold Individually.
Installation Instructions
chester from Tampa, FL
Compressor making excessive noise
One front roller was flat on one side. Decided to replace all rollers at same time. Placed shims under unit and removed mounting screws for one front and one rear roller. With new rollers in place, I was able to level the refrigerator side to side, but unable to do so, front to back. Left the new front roller in place and reinstalled the old rear roller. Have decided to replace refrigeratorin the near future. This is one of my few repair failures! Read more...
Your Price
$29.52
  In Stock
Amana Refrigerator ROLLER-CAB
★★★★★
★★★★★
2 Reviews
PartSelect Number PS11755335
Manufacturer Part Number WPW10475495
Sold individually.
Installation Instructions
Hans from OGDEN, UT
Raise side of fridge and slide 2x4 under side with broken wheel.
Remove back side cardboard access cover. About 6 dcrews need to be removed. Remove 9/16” bolt and lower compressor tray frame down to slide out wheel axel. Place wheel in slot and replace axel. Lift compressor tray and replace 9/16” bolt. Replace cardboard cover. Remove 2x4. Read more...
Your Price
$46.66
  In Stock
Amana Refrigerator Cabinet Roller Assembly - Right Front
PartSelect Number PS11752443
Manufacturer Part Number WPW10304659
Your Price
$44.30
  In Stock
Amana Refrigerator Cabinet Rear Roller - Kit of 2
PartSelect Number PS371783
Manufacturer Part Number 4388239
Installation Instructions
Teri from West Valley City, UT
We were getting ice forming in the freezer compartment and water in the frig compartment
A. remove food from freezer and store in cooler etc.
B. turn off frig with dial in main compartment, then pull frig out away from wall and unplug and remove the cover ( It is located at the bottom of the frig and may be cardboard and contains a handfull of 1/4" screws) exposing the compressor and drain tube (this is a good time to vacume the compressor and coil area)
c. Take false back off from freezer by removing two 1/4 inch screws.
Next,
1. we made sure that the drain tube that runs down to a drain pan near the evaporator coil was clear, we did this by using a small aount of rock salt to speed up the melting of the ice then poured small amounts of hot water (boiling into the drain hole and soon the water flowed down the tube and into the pan below.
2. We then pushed a #12 standed electrical wire (with its end stripped back 1-1/2" then folding the strands back to create a broom) down the tube to the pan to push out any debree that may be present i.e. tin foil plastic bag particles, food chunks etc.
Making sure that this drain tube is clear is the first thing that could be causing the ice build up and water in the lower compartment!
However, I performed this several times and didn't change the problem so I chose to change the parts associated with defrost:
1. defrost heater, which is very easy to change. it is mostly plug and play but does require a pair of needle nose pliers to open a couple of metal fins to remove heater from its mounts, just be gentle with the process.

2. defrost thermostat, which is also very easy to change (Simply pull it off of a copper tube) but requires you to cut two wires near the old part and wire nut the new part wires to the remaining original wires, I added some anti oxident to the wires inside the wire nut to prevent a bad connection from developing do to moisture in this area (You can buy wire nuts with this already inside them, do this)and I taped the wire nut with a few inches of ELECTRICAL TAPE CLOSING OFF THE OPENING OF THE WIRE NUT.
You can then put his cabinet back together!
3. I also decided to change the defrost timer which is located inside a cover where the frig temperture setting dial is located. It is held to this cover by two phillips screws the cover is held in place by one 1/4" screw.
once you have the cover off and the defrost timer unscrewed you must remove a plug from the timer!
Now if you got the exact part you simply reinstall the defrost timer plug in the same postion on the new timer and screw the timer back onto its mount etc. However you may need to determine if the new timer is in the "DEFROST" position and you will need to take it out of that position by I assume rotating the timer mechanism (Ask a tech person about this)!!!!!!!!!
Then with all that done plug your frig vack in reposition it turn it on and be proud of yourself.

Now, if you recieved the timer I did it may look the same as the old one, but it may contain a black wire!!!
You will need to know which type of defrost timer application you frig uses:
1. Continuous run
2. version 1 Cumulative compressor run.
or
3. version 2 Cumulative compressor run.
I found a wiring diagram folded up and stored in the grill in the bottom of the front of the frig that helped me determine this. you will need to be able to read a wiring diagram but I found this situation to be simply a matter of matching examples of pictures (line diagrams). It is important though as you must determine which timer application your frig has because the black wire must be placed on a certain terminal for proper operation.

I replaced a three parts and may have, through trouble shooting, been able to save some money by not replacing all these parts. However , I found that when I went for guidance on trouble shooting that i.e. with the heater that ohmic values of the old part may be near the new part that it may still not be conclusive!? so for a hundred bucks my frig may last 5-10
Read more...
Your Price
$24.68
  In Stock
Amana Refrigerator Roller
PartSelect Number PS11743617
Manufacturer Part Number WP67005149
Sold individually.

Related Amana Refrigerator Parts