This authentic, white Drum Bearing Slide, also known as the bearing drum slide, glide, or pad, is a plastic, easy-to-install part for your dryer. It replaces the dryer's front drum slide to allow for ...
$18.62
In Stock
Order within the next 9 hrs and your part ships today!
This original equipment manufacturer Drum Bearing Slide is a plastic, green, easy-to-install part for your dryer. It replaces the dryer's front drum slide to allow for easier movement. You'll know if...
$14.32
In Stock
Order within the next 9 hrs and your part ships today!
This OEM Timer Knob is a white plastic knob which can be easily installed onto your machine's timer rod, in order to control the timer. If the part breaks off, it should be replaced. Refer to your use...
$19.42
In Stock
Order within the next 9 hrs and your part ships today!
This rear drum bearing kit includes a shaft, ground strap, bearing, seven screws, and installation instructions. The bearing plate comes with a slot in it for the ground strap. This part helps keep yo...
$88.34
In Stock
Order within the next 9 hrs and your part ships today!
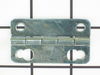
This door latch is designed for your dryer, and is mounted to the dryer frame. The door latch holds the door of your dryer closed while the machine is operating. If your dryer door is not catching on ...
$11.40
In Stock
Order within the next 9 hrs and your part ships today!
The interlock switch may also be referred to as a belt switch. This part is a simple on/off mechanism that prohibits the appliance from operating when the door is open. This is a part for your dryer. ...
$27.50
In Stock
Order within the next 9 hrs and your part ships today!
TThe door strike for your dryer is mounted on the dryer frame that the door shuts onto. It fits into the door catch on the door and keeps the door closed. If the door strike is damaged or missing, the...
$8.56
In Stock
Order within the next 9 hrs and your part ships today!
This part is the replacement main valve coil for your dryer. It is black and white in color and has 2 terminals. It is approximately 1 inch long and 1 inch wide. The main valve coil opens the gas valv...
$29.64
In Stock
Order within the next 9 hrs and your part ships today!
Questions And Answers for 64100139
We're sorry, but our Q&A experts are temporarily unavailable.
Please check back later if you still haven't found the answer you need.
first I took the dryer apart 1st thing i did was unplug the power supply (safety first) then I removed the top of the unit then removed the front cleaned all the lint from the inside of the cabinet I found the proper belt size on part select.com the next day I had my dryer belt delivered (which cost 1/3 the price of the local repair shop
... Read moreprice) then I placed the belt over the dryer drum and made sure it was in the general location it should be I then replaced the front cover and the top. then I removed the rear cover which was held on by six 5/16 sheet metal screws which gave me access to the drive pulley and belt tensioner the belt goes on by going under the tensioner then around the drive pulley Then i rotated the drum by hand to make sure everything had clearance I then buttend everything up plugged it and started it up it workd fine and I figure Ill get another 8 years out of it Thank you partselect.com
The end repair was very simple and took minimal effort. The time and difficulty was all in the testing. I disassembled the dryer and removed the drum and then hard wired each thermo-fuse to determine where the fault was. After test all of those I was stumped. When I opened the door the light would not come on so I assumed it was a pow
... Read moreer fault closer to the source. However after all of my testing I couldn't find anything wrong. I then removed the light bulb and realized it was burned out which led me to the door switch being the fault. I removed the switch and soldered the three wire together and the dryer started right up! All I had to do was order a new $15 part, unsolder the wires and plug them in. Would have been so much simpler if that light bulb hadn't of been burned out causing me to over think my diagnosis. This was my first major appliance repair and I did it with only the help of the parts diagram provided on the website.
-Removed top panel -Removed right side panel -Gas coils were held in together under a metal strap -Removed 2 screws holding strap -Unplugged 1 wire harness to each coil -Removed Primary and Holding coil -Replace with two new coils, replace strap and plug in each harness -Replace side, then top panel
... Read more>-Under 1 hour job...Took 45 minutes to remove/replace panels and only 5 minutes to replace coils. -Anyone with a little mechanical ability can save $150 in labor and spend just $50 in parts to fix this problem. -Questions: Erik at elstransport13@gmail.com


 – Part Number: WE1M504")
 – Part Number: WE1M1067")


")
")


