Models > ASD2575BRS01 > Symptoms > Noisy

Parts That Fix Amana Refrigerator ASD2575BRS01 Noisy

Noisy is a commonly reported symptom for the ASD2575BRS01 Amana Refrigerator, and we have put together a full guide on how to fix this. This advice is based on feedback from people who own this exact appliance. We have listed the most common parts for your ASD2575BRS01 Amana Refrigerator that will fix Noisy. We have included repair instructions, and helpful step-by-step video tutorials. If you are experiencing this issue, not to worry, DIYers just like you have fixed this, and shared their experience to help you!

Fixes Symptom 27% of time
★★★★★
★★★★★
23 Reviews

Rated by 24 customers 


Easy 

15 - 30 mins 

Ratings submitted by customers like you who bought this part.   

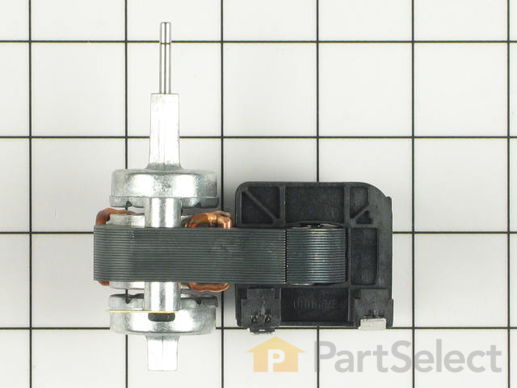
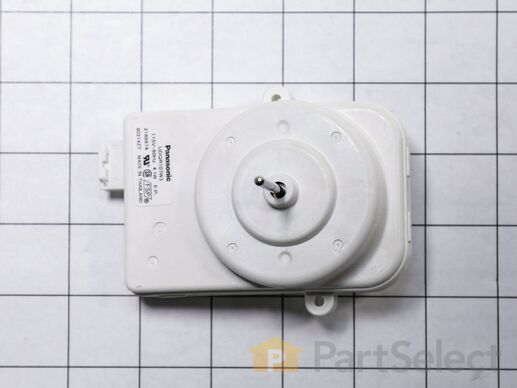
This part is located in the back of the freezer, and circulates air over the refrigerator coils. These coils will convert the heat into cool air, which is then circulated. Fan blade not included.

$ 85.47
  In Stock
PartSelect Number PS557957
Manufacturer Part Number 4389144

Replacing your Whirlpool Refrigerator Evaporator Fan Motor - 120V 60Hz

Replacing your Evaporator Fan Motor - 120V 60Hz

Customer Repair Stories

Excessive noise was coming from the freezer section of my side be side refrigerator

Cleaning out the freezer took the longest time. Once the freezer was clean I turned off the freezer which did not deactivate the light in the freezer. This is a tight area to work in and not having to hold a flashlight made the job much easier. I then removed the shelf slider brackets for the 3 lower pullout drawers. The next step was to remove the interior aluminum back panel (6 screws) which covers the evaporator motor and the coil. Before removing the 3 electric wires that are attached to the evaporator motor make sure the power is off to the motor. The removal of the motor was fairly straightforward and I would suggest removing the plastic fan blade first and then the connector wires. It helped knowing in advance that the plastic fan blade would come off with a little prying. Be careful when prying the fan off so that you don’t damage the plastic motor mount bracket. Once you have installed the motor I would suggest turning the freezer back on to make sure that the evaporator motor works before reinstalling the aluminum back panel and slider brackets.
  • Jon from Houston, TX
  • Difficulty Level:
    Easy
  • Total Repair Time:
    15 - 30 mins
  • Tools:
    Pliers, Screw drivers
43 of 45 people found this instruction helpful.
Was this instruction helpful to you?
Thank you for voting!

evaporator fan stopped working

1) removed the face plate that runs 3/4 way up the back of the freezer side. a total of 8 screws. (6")
2) disconnected the three electrical connections.(30sec)
3) removed the fan of the the old evaporator fan motor (5sec)
3) removed the fan motor (1")
4) put in the new fan motor (1")
5) put on the old fan on the new fan motor(5sec)
6) reconnected the three electrical connections (30sec)
7) replaced the face plate on the back of the freezer (6")
Had re-frozen meat within 1 hour.
  • Antoni from vail, AZ
  • Difficulty Level:
    Really Easy
  • Total Repair Time:
    Less than 15 mins
  • Tools:
    Pliers, Screw drivers
95 of 104 people found this instruction helpful.
Was this instruction helpful to you?
Thank you for voting!
Fixes Symptom 26% of time
★★★★★
★★★★★
4 Reviews

Rated by 11 customers 


Easy 

30 - 60 mins 

Ratings submitted by customers like you who bought this part.   

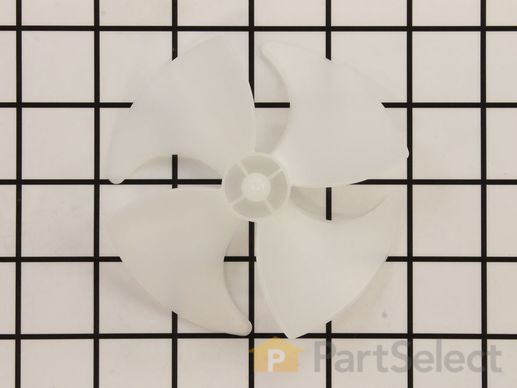
If your refrigerator or freezer is too warm, or making noises, you may need to replace the fan blade. The fan blade attaches to the evaporator motor, which is in the freezer section, to help circulate the cold air into the refrigerator and freezer sections. The fan blade is white in color and made from plastic. This is a genuine OEM part. Please be sure to disconnect the power to your refrigerator before starting your repair.

$ 37.20
  In Stock
PartSelect Number PS11738973
Manufacturer Part Number WP2169142

Replacing your Whirlpool Refrigerator Evaporator Fan Blade

Replacing your Evaporator Fan Blade
Fixes Symptom 18% of time
★★★★★
★★★★★
15 Reviews

Rated by 1 customer 


Really Easy 

Less than 15 mins 

Ratings submitted by customers like you who bought this part.   

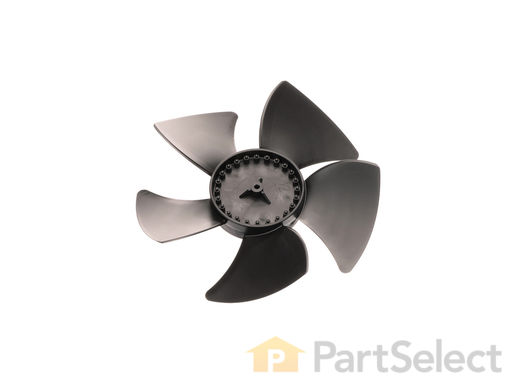
The fan blade is used to blow air over the condenser.

$ 66.07
  In Stock
PartSelect Number PS1964356
Manufacturer Part Number W10156818

Replacing your Maytag Refrigerator Fan Blade

Replacing your Fan Blade

Customer Repair Stories

broken fan blade

unplug refrigerator, take backing off with nut driver. Pull old blade off and put new blade on. Put backing back on and plug in.
  • David from Ceres, CA
  • Difficulty Level:
    A Bit Difficult
  • Total Repair Time:
    15 - 30 mins
  • Tools:
    Nutdriver
Was this instruction helpful to you?
Thank you for voting!

Wife used vacuum cleaner and busted blade off fan

Instructions were great five minutes to remove and replace fan....Thank You............ saved big money
  • Robert from GOSHEN, IN
  • Difficulty Level:
    Really Easy
  • Total Repair Time:
    Less than 15 mins
  • Tools:
    Screw drivers
2 of 2 people found this instruction helpful.
Was this instruction helpful to you?
Thank you for voting!
Fixes Symptom 15% of time
★★★★★
★★★★★
87 Reviews

Rated by 54 customers 


Really Easy 

15 - 30 mins 

Ratings submitted by customers like you who bought this part.   

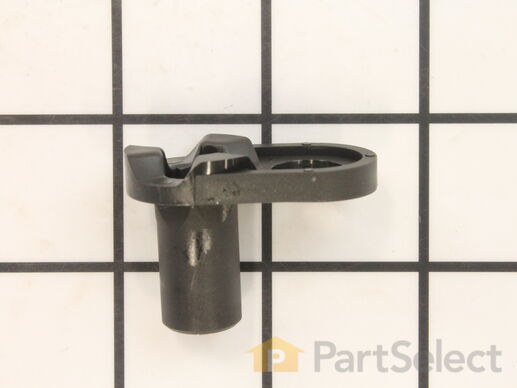
The lower door closing cam is used in refrigerator doors, it can be located on the fresh food side or the freezer side. It helps hold the door open. This cam is made out of plastic, so it might crack or wear down over time. If your door will not open and close properly you may need to replace the door closing cam. To successfully install this part, you will need a 5/16 nut driver and a small flat blade screwdriver. Before you begin, unplug your appliance and disconnect the water supply. Lubricating this part may help with installation. This replacement part is sold individually. This part will fit both the left and right side of your refrigerator door. To make the repair, remove the top hinge cover, then the top hinge support. Lift the door from the bottom support and remove the old door cams. Replace the cams, using a little lubricant if necessary, and place the door back on the lower hinge support. Replace the top hinge support and your repair is complete!

$ 7.72
  In Stock
PartSelect Number PS11739042
Manufacturer Part Number WP2182179

Replacing your Whirlpool Refrigerator Lower Door Closing Cam

Replacing your Lower Door Closing Cam

Customer Repair Stories

refrigerator door not working properly

Just as shown on your video.The refrigerator side was not sitting even, clunked and did not seal right. I decided to do.both sides, refrigerator and freezer while I was at it as our refrigerator is about 16 years old. Everything went in easily and saved us a lot of money. Very happy with the parts and repair video. Got the refrigerator nice and cleaned out while we were at it..Us and the refrigerator are breathing easier now..Yeepppeee....
  • Dennis from MORRO BAY, CA
  • Difficulty Level:
    Very Easy
  • Total Repair Time:
    30 - 60 mins
  • Tools:
    Pliers, Socket set
2 of 2 people found this instruction helpful.
Was this instruction helpful to you?
Thank you for voting!

Worn out door plastic cam

Replaced the door cam on bottom of fridge door. ONE THING TO UNDERSTAND- THERE ARE 2 CAMS ON THE DOOR, LOWER AND UPPER, BUT THE UPPER CAM IS NOT LISTED ON THE "DOOR HARDWARE" DRAWING, ITS LISTED ON THE MAIN BODY DRAWING! BE SURE TO GET BOTH CAMS! (PARTSELECT COULD MAKE A NOTE THAT WHEN PEOPLE LOOK UP LOWER CAM, PUT A NOTE IN THERE SAYING Y0U NEED UPPER TOO!)So I had to order the upper cam later and install later. BUT it is quite easy to replace, unlike the video, I only needed 1 tool! The nut driver (electric screwdriver w nut driver head). Thanks -RF
  • ROGER from WAXHAW, NC
  • Difficulty Level:
    Really Easy
  • Total Repair Time:
    15 - 30 mins
  • Tools:
    Nutdriver
34 of 35 people found this instruction helpful.
Was this instruction helpful to you?
Thank you for voting!
Fixes Symptom 10% of time
★★★★★
★★★★★
2 Reviews

Rated by 6 customers 


Easy 

30 - 60 mins 

Ratings submitted by customers like you who bought this part.   

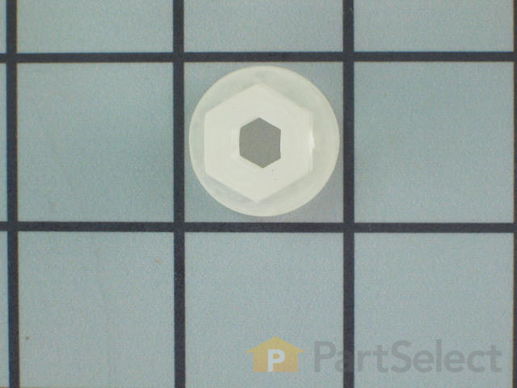
Sold Individually - Appliance originally takes 2.

$ 10.10
  In Stock
PartSelect Number PS11739011
Manufacturer Part Number WP2176759

Customer Repair Stories

The ice dispenser handle wasn't working properly. Sometime when dispenser handle was pressed it didn't dispense ice on the first try.

I installed a Ice Door Kit. It works Great Now!
  • Richard from CONYERS, GA
  • Difficulty Level:
    Really Easy
  • Total Repair Time:
    1- 2 hours
  • Tools:
    Screw drivers
1 of 3 people found this instruction helpful.
Was this instruction helpful to you?
Thank you for voting!

Noise in Evaporator Fan section

Opening up the Evaporator Fan section was a quick and easy job. After opening, I checked and removed the fan and looked at the grommet. The grommet on the fan was tight and secure and I could no longer hear the noise. I closed the opening. Something I had done while checking the fan grommet must have solved the problem. I have not hear the noise again!
  • Richard from HOLLISTER, CA
  • Difficulty Level:
    Really Easy
  • Total Repair Time:
    30 - 60 mins
  • Tools:
    Screw drivers
4 of 8 people found this instruction helpful.
Was this instruction helpful to you?
Thank you for voting!
Fixes Symptom 4% of time
★★★★★
★★★★★
5 Reviews

Rated by 1 customer 


Easy 

30 - 60 mins 

Ratings submitted by customers like you who bought this part.   

This fan motor circulates the air through the refrigerator grille and cools the compressor and condenser coils. It also helps to evaporate extra water in the drain pan. Please note: If the original fan motor has 3 terminals please order part number W10204250, otherwise order this part (WP2188874).

$ 193.68
  In Stock
PartSelect Number PS11739140
Manufacturer Part Number WP2188874

Replacing your Whirlpool Refrigerator Condenser Fan Motor

Replacing your Condenser Fan Motor

Customer Repair Stories

Front bearing had worn so that the fan vibrated causing the noise.

I removed the cardboard back then using a nut driver removed the three mounting screws, removed the old fan/motor and installed the new one, installing the three screws and replacing the cardboard cover.

My big problem was getting the right parts. Don't ever order refrigerator parts using the refrigerator model number. I did and got the wrong part, sent it back and talked to the parts lady and ordered again describing the error, the needed parts shape etc and she sent me the exact part I had sent back. I sent it back and removed the fan motor to get the part number, called and ordered by number and got the right one. Hallelujah!
  • Earl from PIMA, AZ
  • Difficulty Level:
    Easy
  • Total Repair Time:
    30 - 60 mins
  • Tools:
    Nutdriver, Pliers
7 of 7 people found this instruction helpful.
Was this instruction helpful to you?
Thank you for voting!