Models > MEDC400VW0 > Symptoms > Marks left on clothes

Parts That Fix Maytag Dryer MEDC400VW0 Marks left on clothes

Marks left on clothes is a commonly reported symptom for the MEDC400VW0 Maytag Dryer, and we have put together a full guide on how to fix this. This advice is based on feedback from people who own this exact appliance. We have listed the most common parts for your MEDC400VW0 Maytag Dryer that will fix Marks left on clothes. We have included repair instructions, and helpful step-by-step video tutorials. If you are experiencing this issue, not to worry, DIYers just like you have fixed this, and shared their experience to help you!

Fixes Symptom 57% of time
★★★★★
★★★★★
41 Reviews

Rated by 24 customers 


Easy 

1- 2 hours 

Ratings submitted by customers like you who bought this part.   

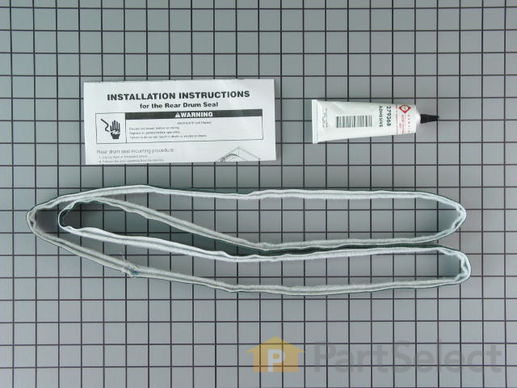
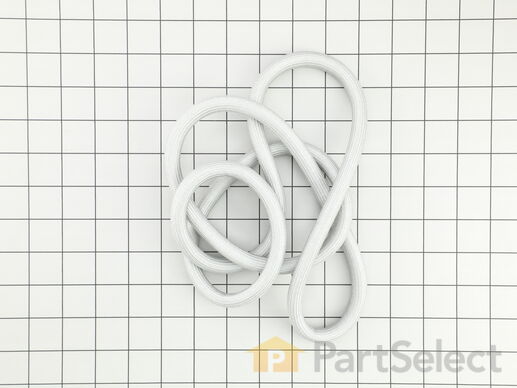
This seals Includes adhesive. This part helps seal the drum to prevent hot air from escaping.

$ 64.81
  In Stock
PartSelect Number PS8691753
Manufacturer Part Number W10612022

Replacing your Whirlpool Dryer Rear Drum Felt Seal

Replacing your Rear Drum Felt Seal

Customer Repair Stories

Aft seal deterioated and causing brown spot on clothing due to netal to metal contact.

Removed top and front of dryer then drum and followed the instructions in the package. It was a real simple procedure. I did additional cleaning while the dryer was disassembled.
  • Cleo from Laurinburg, NC
  • Difficulty Level:
    Easy
  • Total Repair Time:
    1- 2 hours
  • Tools:
    Nutdriver, Screw drivers
11 of 12 people found this instruction helpful.
Was this instruction helpful to you?
Thank you for voting!

Rear Dryer Seal was old and staining clothing

After unplugging the dryer,I removed 2 bolts on the back top of the dryer, then removed the two screws in the lint box area. I used a screw driver to help force the top panel of the dryer up. When open, I removed the top screws that held the front and side panels together. I then lifted the front panel up and away from the dryer, so there would be room to take the drum out. I removed the belt from the pulley (located under the drum) and slid the drum out. I removed the old seal, cleaned up the drum and the inside of the dryer, then glued the new seal on. After the glue was dry, I put the drum back in (with the belt on the drum), put the belt back on the pulley and proceeded to put the dryer front back on. Once the front was on, I put the top back on and replaced the bolts on the back of the dryer. I plugged it in and it is working great! By the way, before this, I had NEVER attempted to repair a dryer before and I am female. If I could do it, so can anyone else willing to try :)
  • Grace from Phoenix, AZ
  • Difficulty Level:
    Easy
  • Total Repair Time:
    30 - 60 mins
  • Tools:
    Screw drivers, Socket set
58 of 64 people found this instruction helpful.
Was this instruction helpful to you?
Thank you for voting!
Fixes Symptom 17% of time
★★★★★
★★★★★
10 Reviews

Rated by 11 customers 


Easy 

1- 2 hours 

Ratings submitted by customers like you who bought this part.   

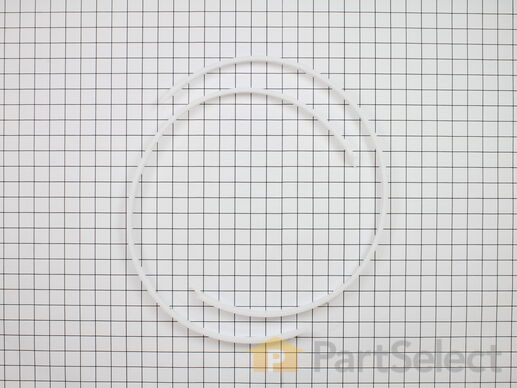
This is a replacement bearing ring kit for your dryer. The bearing rings are found on the top and bottom lips of the dryer drum. If your dryer is unusually noisy, or the drum will not turn during operation, or if there are marks left on your clothes after a cycle, you may need to replace the bearing ring kit. The kit comes with 2 bearings, one for the top and one for the bottom of the dryer drum. Remove the front panel of your dryer to access the dryer drum for this repair. At this point you can use a pair of needle nose pliers to release the old bearing rings from the drum. Snap the new bearing rings on, and reassemble the dryer to complete your repair.

$ 58.83
  In Stock
PartSelect Number PS334199
Manufacturer Part Number 279441

Replacing your Whirlpool Dryer Two-Piece Split Ring Bearing

Replacing your Two-Piece Split Ring Bearing

Customer Repair Stories

making thumping noise because bearing was easy

Took old bearing off replaced with new
  • Eunice from Boyne City, MI
  • Difficulty Level:
    Easy
  • Total Repair Time:
    30 - 60 mins
  • Tools:
    Nutdriver, Screw drivers
Was this instruction helpful to you?
Thank you for voting!

The dryer tub became jammed, unable to turn.

I followed disassembly directions found on youtube and replaced th two-piece ring bearing that was identified by a parts diagra fron PartSelect. The repair was easy. Fix time was about thirty mionutes.
  • Terry from Lindsay, CA
  • Difficulty Level:
    Really Easy
  • Total Repair Time:
    15 - 30 mins
  • Tools:
    Nutdriver, Pliers, Screw drivers
3 of 6 people found this instruction helpful.
Was this instruction helpful to you?
Thank you for voting!
Fixes Symptom 7% of time
★★★★★
★★★★★
6 Reviews

Rated by 15 customers 


Easy 

1- 2 hours 

Ratings submitted by customers like you who bought this part.   

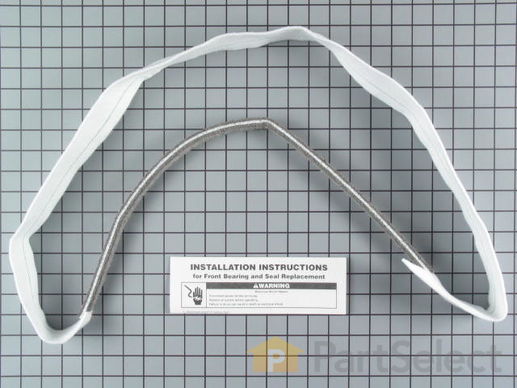
This front panel seal kit doesn't include the plastic retainers, reuse the old retainers. No glue is needed, the seal stretches to fit.

$ 69.47
  In Stock
PartSelect Number PS11773177
Manufacturer Part Number W11035878

Replacing your Whirlpool Dryer Seal and Bearing

Replacing your Seal and Bearing

Customer Repair Stories

Loud screeching noise when dryer running

First, removed the bottom cover below the dryer door. This is just held on with two clips that can be pushed in with a flat screw driver. Then remove the springs that go from the bottom of the dryer to the inside of the dryer door. We had to remove the entire front of the dryer, so the easiest way we found was to loosen the two screws on the bottom of the front panel, but not remove them. Then pop up the top of the dryer. To lift the top, first remove the two screws under the little door where the lint trap goes. The top is hinged in the back, and it snaps down onto two clips that can easily be popped up with a flat screw driver) With the top opened, there are two screws accessible. When the front of the dryer is removed, there will be nothing to support the drum, so what we found was that if you rotate the drum, you'll find a point where there's a hole in the top of the drum. If you take the springs that you removed from the bottom of the door you can hook them into this hole, and hook the other end into a hole in the back wall of the dryer just behind the drum. The springs are the perfect size for this, and it keeps the drum from falling when you remove the front panel. then just disconnect the three wires going to the switch inside the front panel, and remove the two screws from the top of the front panel. It should then lift right off. The bearing can just be pulled away and the new one installed. Put everything together again in reverse order.
  • Stephen from Charlotte, NC
  • Difficulty Level:
    Easy
  • Total Repair Time:
    30 - 60 mins
  • Tools:
    Nutdriver, Screw drivers
6 of 6 people found this instruction helpful.
Was this instruction helpful to you?
Thank you for voting!
Fixes Symptom 6% of time
★★★★★
★★★★★
118 Reviews

Rated by 103 customers 


Easy 

30 - 60 mins 

Ratings submitted by customers like you who bought this part.   

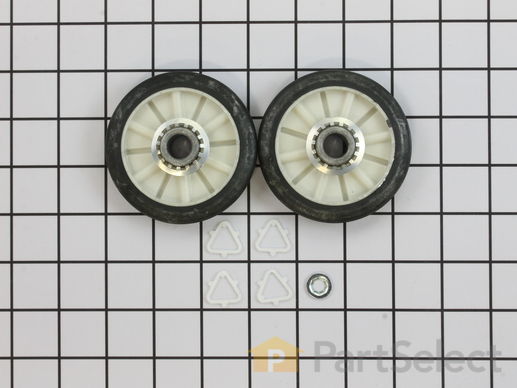
The drum support roller kit allows the dryer to tumble properly by supporting the drum cylinder. The kit includes two drum rollers, four tri-rings, and one palnut (or retaining washer). The kit does not include a belt or idler pulley and rollers are not sold individually. The drum support roller kit may need to be replaced if the dryer is noisy or will not tumble. The tools needed to complete this repair are a putty knife, Phillips screw driver, and a 5/16 nut driver. This is an OEM part sourced directly from the manufacturer.

$ 14.40
  In Stock
PartSelect Number PS347627
Manufacturer Part Number 349241T

Replacing your Kenmore Dryer Rear Drum Support Roller Kit

Replacing your Rear Drum Support Roller Kit

Customer Repair Stories

Loud rumble noise while drum was turning

First I pulled out lint catcher, you will see two screws ,removed two the screws on top ,( philips head screw driver) I than took a putty knife and pushed in the front of the dryer under the lid and lifted the top up, I than removed a self tapping screw on each side with a 5/16 wrench and lifted the front panel out. I than pulled out the drum and this exposed the two rollers, I than pulled of the nut locks with athe pliers , took off the plastic triangle snaps and pullled off the old rollers , replaceing them with the new ones,put the triangle locks on and that the lock nuts on , I than put the drum back in, than the front panel, replaceing the two self tapping screws , snapped down the top,replaced the other two screws again on top and replaced the lint catcher, I was done.
  • Marcia from CAmden, NY
  • Difficulty Level:
    Easy
  • Total Repair Time:
    30 - 60 mins
  • Tools:
    Pliers, Screw drivers, Wrench set
9 of 11 people found this instruction helpful.
Was this instruction helpful to you?
Thank you for voting!

Replacing worn drum support rollers and shafts.

Very easy once I figured out how to open it up to see what was the matter.
1 Remove power.
2 Open the lint filter cover and remove the 2 Phillip screws.
3 Pry the front of the top cover up to separate the cover from the plastic clips that secure to the top front panel.
4 Remove the 2 nut screws securing the top of the front panel to each side cover.
5 Pull front panel out slightly to detach wiring from the cover switch.
6 Pull front panel straight up and set aside.
7 Remove drum belt from tensioner and motor pulley under the drum.
8 Remove drum by pulling it toward the front between the 2 sides.
9 Locate the 2 support rollers and their mounting shafts. Change the shafts at this point if they are worn. (Mine were OK)
10 Remove the support bracket from the shaft if present.
11 Remove the plastic triangular retainer from the shaft and slide the old wheel off of the shaft.
12 Clean the shaft from any bearing debris.
13 Replace the rollers and retainers.
14 Insert drum through the front side panels making sure the seal on the rear of the drum is centered around the opening and not folded inside the opening.
15 Place the belt on the drum and thread the belt through the tensioner and around the motor pulley.
16 Position the front cover on the lower clips on each of the sides.
17 Re-attach the 2 wires for the cover switch.
18 Pull the drum up so the opening on the drum and front cover align.
19 Screw together the side panels to the front panel using the 2 hex headed screws.
20 Check for binds by rotating the drum several times by hand.
21 Press the front of the top panel down toward the front panel to engage the plastic clips attaching the top to the front. Watch for the lint filter housing alignment as you push the top panel down.
22 Replace the 2 screws to attach the lint filter to the top cover.
23 Plug in machine and test.

Good luck, It s not as bad as it sounds.
  • Gary from Canton, CT
  • Difficulty Level:
    Easy
  • Total Repair Time:
    15 - 30 mins
  • Tools:
    Nutdriver, Pliers, Screw drivers
56 of 62 people found this instruction helpful.
Was this instruction helpful to you?
Thank you for voting!
Fixes Symptom 5% of time
★★★★★
★★★★★
3 Reviews

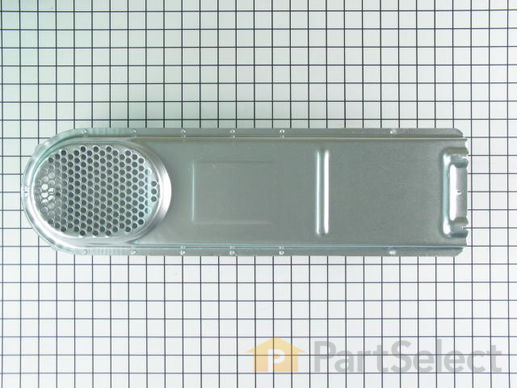
The heating element is not included with this box.

$ 163.41
  In Stock
PartSelect Number PS11746303
Manufacturer Part Number WP8541818

Replacing your Whirlpool Dryer Box, Heater

Replacing your Box, Heater
Fixes Symptom 5% of time
★★★★★
★★★★★
307 Reviews

Rated by 63 customers 


Easy 

30 - 60 mins 

Ratings submitted by customers like you who bought this part.   

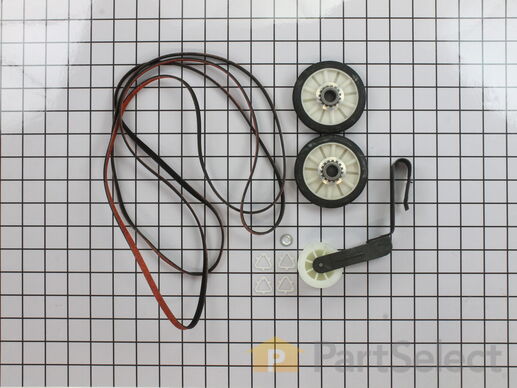
The drum support roller kit (Dryer Repair Kit) allows the dryer to tumble properly by supporting the drum cylinder. The idler pulley provides the tension required for a multi-ribbed belt. The belt attaches to the drum, idler pulley, and motor pulley. If your dryer is damaged, it may be making loud, squeaking, and/or squealing noises while the drum is turning. This is from normal wear and tear. The drum may eventually stop turning all together. This is a sign the part should be replaced. This is one complete maintenance kit. The kit includes the drum belt, drum support rollers, one idler pulley, four tri-rings, and one clip. The parts are constructed of plastic, metal, and rubber, and come in black/white/silver.

$ 37.55
  In Stock
PartSelect Number PS373087
Manufacturer Part Number 4392065

Replacing your Whirlpool Dryer Maintenance Kit

Replacing your Maintenance Kit

Customer Repair Stories

Dryer making extra noise while running

1st Unpluged power.
2nd removed two screws under lint screen cover.
3rd poped up lid with flathead screwdryer, then removed (2) 5/16 screws from door cover and unpluged lid switch, lifted up dryer door pannel
4th removed drum
5th took out plastic triangle wheel rings
6th removed old belt guild (to motor pully) ... Read more />7th removed old wheels and plastic rings stops
8th cleaned excessive hair dust with shopvac
9th put new replaicment part in dryer. made sure to turn manually to make sure belt was lined up properly, then put all dryer peices back.
10th aditional work, took back cover off and removed the (4) 1/4 screws for lint screen case (left side in dryer) vacumed out any excessive dirt lint ect, also cleaned any excessive dust I found in back of dryer, dryer , exhaust ect, and put all back together.
JUst like a new dryer aain after all PM was complete.
  • Michael from Haines City, FL
  • Difficulty Level:
    A Bit Difficult
  • Total Repair Time:
    1- 2 hours
  • Tools:
    Nutdriver, Screw drivers, Wrench (Adjustable)
79 of 88 people found this instruction helpful.
Was this instruction helpful to you?
Thank you for voting!

Broken drive belt

Grow a second set of hands. Always unplug any appliance. Remove lint screen. remove two screws (philips Head). I took a wooden shim lightly tapped w/hammer to pop front of dryer top free. Mine worked on hinges and just flipped back til it rested against the wall. Removed two 5/16 screws inside holding face on carefully raise face section off the support clips at either side on the bottom. Pull drum out (I have the large style drum commercial size [approx.). Clean the inside free of all lint (known to be fire hazard). Sling new belt around drum. Get newly grown set of hands to hold drum in place. Pinch belt to fit between tensioner, lift tensioner and place belt around motor pulley. Spin drum couple times to make certain belt isn't twisted. Reverse dismantle proccess to put back together. Replace all parts that come with kit, you'll feel better knowing you got a new dryer, almost.
  • DENNIS from ALTOONA, FL
  • Difficulty Level:
    A Bit Difficult
  • Total Repair Time:
    1- 2 hours
  • Tools:
    Nutdriver, Screw drivers
275 of 302 people found this instruction helpful.
Was this instruction helpful to you?
Thank you for voting!
Fixes Symptom 3% of time
★★★★★
★★★★★
17 Reviews

Rated by 8 customers 


Really Easy 

15 - 30 mins 

Ratings submitted by customers like you who bought this part.   

This door seal does not include the adhesive glue.

$ 67.04
  In Stock
PartSelect Number PS11731610
Manufacturer Part Number W10861521

Replacing your Whirlpool Dryer Door Gasket

Replacing your Door Gasket

Customer Repair Stories

wore out gasket

removed old gasket took door off 4 screws. cleaned seal area applied glue put on gasket easy
  • diora from ROCKFORD, IL
  • Difficulty Level:
    Very Easy
  • Total Repair Time:
    Less than 15 mins
  • Tools:
    Pliers, Screw drivers
3 of 3 people found this instruction helpful.
Was this instruction helpful to you?
Thank you for voting!

Door Gasket tore out

Put high temperature glue on first, then put door gasket over the high temperature glue and then let it set for 24 hours. It worked fine....
  • Manolak from MURFREESBORO, TN
  • Difficulty Level:
    Easy
  • Total Repair Time:
    Less than 15 mins
15 of 15 people found this instruction helpful.
Was this instruction helpful to you?
Thank you for voting!