Models > MFI2269VEM7 > Symptoms > Leaking

Parts That Fix Maytag Refrigerator MFI2269VEM7 Leaking

Leaking is a commonly reported symptom for the MFI2269VEM7 Maytag Refrigerator, and we have put together a full guide on how to fix this. This advice is based on feedback from people who own this exact appliance. We have listed the most common parts for your MFI2269VEM7 Maytag Refrigerator that will fix Leaking. We have included repair instructions, and helpful step-by-step video tutorials. If you are experiencing this issue, not to worry, DIYers just like you have fixed this, and shared their experience to help you!

Fixes Symptom 82% of time
★★★★★
★★★★★
30 Reviews

Rated by 11 customers 


Really Easy 

30 - 60 mins 

Ratings submitted by customers like you who bought this part.   

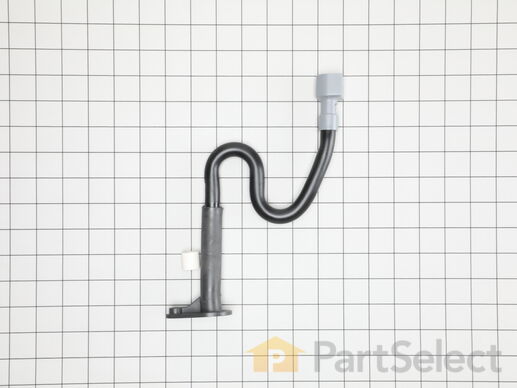
The p-trap drain tube kit may also be known as the duck bill, or the drain pipe, and it is compatible with your refrigerator. The function of the p-trap drain kit is to carry the water that has formed during the defrost cycle to the bottom of the refrigerator, where your drain pan is located. The tools you will need for this repair include a 1/4-inch nut driver and a small flat-blade screwdriver. To do this repair you will need to pull the refrigerator forward in order to reach the lower access panel at the back. This kit includes the tube extension piece and spacer.

$ 39.50
  In Stock
PartSelect Number PS8691807
Manufacturer Part Number W10619951

Replacing your Whirlpool Refrigerator P-Trap Drain Tube Kit

Replacing your P-Trap Drain Tube Kit

Customer Repair Stories

Freezer icing up .

Watched Partselect video of P-trap installation.Removed water line & back cover& disconnected wires to water solenoid .Removed old drain tube & old problematic rubber funnel. Used contact cleaner to clean rubber residue from drain line and used a little silicone to aide reassembly. Job went well thanks to video.
  • Rich from Lansing, IL
  • Difficulty Level:
    Easy
  • Total Repair Time:
    30 - 60 mins
  • Tools:
    Nutdriver, Wrench (Adjustable)
11 of 12 people found this instruction helpful.
Was this instruction helpful to you?
Thank you for voting!

Water leaking from bottom of refrigerator onto floor

The video on website is very good and explains everything in detail. Just follow the directions. This is EASY!!!!
  • Jack from DINUBA, CA
  • Difficulty Level:
    Really Easy
  • Total Repair Time:
    30 - 60 mins
  • Tools:
    Nutdriver, Screw drivers
102 of 111 people found this instruction helpful.
Was this instruction helpful to you?
Thank you for voting!
Fixes Symptom 11% of time
★★★★★
★★★★★
4 Reviews

Rated by 1 customer 


A Bit Difficult 

30 - 60 mins 

Ratings submitted by customers like you who bought this part.   

$ 79.89
  On Order
PartSelect Number PS11756973
Manufacturer Part Number WPW10655367

Customer Repair Stories

The tray that catches the defrost drainage was cracked and leaking.

Unplug the refrigerator and pull it out so you can work behind it.I had to get a helper to lean the refrigerator forward and let it rest on a towel I placed on the countertop. The tray was underneath the refrigerator near the back so I leaned it forward enough to remove the metal plate that holds the tray in place. I placed a scotch behind the front wheels to keep it from rolling backward off the counter it was resting on. I had to remove the cover from the unit on the lower back side of the refrigerator to see how the tray was moumted. Once you remove the plate you have to slide the fan off the tray and then you can remove the tray. Simply reverse the whole process to install the new tray, upright the refrigerator and plug it back in to the outlet.
  • Elmer R from Jenkins, KY
  • Difficulty Level:
    Really Easy
  • Total Repair Time:
    30 - 60 mins
  • Tools:
    Screw drivers
Was this instruction helpful to you?
Thank you for voting!

drip pan was cracked

Removed rear cover, removed fan and than drip tray. install new tray and reassemblied
  • Brian from Bismarck, ND
  • Difficulty Level:
    A Bit Difficult
  • Total Repair Time:
    30 - 60 mins
  • Tools:
    Nutdriver
28 of 82 people found this instruction helpful.
Was this instruction helpful to you?
Thank you for voting!
Fixes Symptom 4% of time
★★★★★
★★★★★
94 Reviews

Rated by 41 customers 


Really Easy 

15 - 30 mins 

Ratings submitted by customers like you who bought this part.   

This water filter (Whirlpool EveryDrop Refrigerator Water Filter, Single Turn Filter) purifies water going to the water dispenser and sometimes the icemaker as well. This part should be replaced if it is causing reduced water flow or just replaced periodically per the owner manual. Replacing this water filter may fix a noisy or leaking fridge, a fridge that is not dispensing water (or reduced flow rate), and an ice maker that is not making ice at all, or not making enough ice. This filter is white, sold individually and measures 8 inches by 3 inches in diameter. This water filter has been updated by the manufacturer. It may appear different but will still function the same. It is sold individually.

$ 104.16
  In Stock
PartSelect Number PS11722130
Manufacturer Part Number EDR4RXD1

Replacing your Maytag Refrigerator Refrigerator Water Filter

Replacing your Refrigerator Water Filter

Customer Repair Stories

Removing the existing filter by rotating as directed and then dislodging from 'docking' station proved difficult. Turns out, the old filter is under a bit of vacuum pressure and getting the unit to separate or release was a challenge.

I removed the drop-down outer housing by gently prying the sides of the two pivot pins at the rear. This gave me move 'room' to grip and slightly rotate then pull the old filter forward and away from the tight suction connection. I was concerned that I would be too forceful for the plastic assemblies and would break something; deliberate motions and a steady thought process on the problem helped disengage the darned old filter!
  • Jake from Novato, CA
  • Difficulty Level:
    Easy
  • Total Repair Time:
    Less than 15 mins
212 of 323 people found this instruction helpful.
Was this instruction helpful to you?
Thank you for voting!

light on to order water filter

Pressed in the end of the filter cover, lowered it down part way. Twisted the old filter 1/4 turn and removed it. Set in the sink to drain. Inserted new filter and twisted it to lock. closed cover. Done. Total time @ 1 Minute.
  • Douglas from Byron, NY
  • Difficulty Level:
    Really Easy
  • Total Repair Time:
    Less than 15 mins
897 of 1010 people found this instruction helpful.
Was this instruction helpful to you?
Thank you for voting!
Fixes Symptom 1% of time
★★★★★
★★★★★
3 Reviews

Rated by 8 customers 


Really Easy 

15 - 30 mins 

Ratings submitted by customers like you who bought this part.   

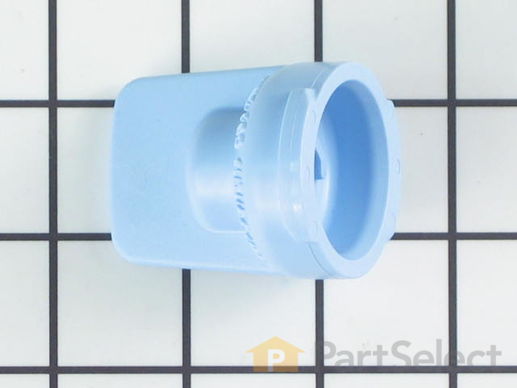
This water filter bypass cap, also known as a water filter bypass plug, is an authentic OEM part that replaces the regular water filter cartridge in refrigerators. It allows water to flow freely through the dispensing system when the filter is not present. The bypass can fail if it becomes clogged, cracked, or falls out of alignment. A faulty filter bypass will result in leaking, poor ice production, and difficulties dispensing water. You can find the filter bypass inside the refrigerator, near the water filter housing. Disconnect the water supply lines and remove the faulty bypass. Insert the new bypass in its place and reconnect the water supply lines.

$ 33.12
  In Stock
PartSelect Number PS12731165
Manufacturer Part Number W11395888

Replacing your Maytag Refrigerator Refrigerator Water Filter Bypass

Replacing your Refrigerator Water Filter Bypass

Customer Repair Stories

no water when under sink water filter installed

I called the installer of my filter unit and he told me that often, thhe fridge filter is the problem. Like magic it worked
  • Emi from Arlington, VA
  • Difficulty Level:
    Easy
  • Total Repair Time:
    Less than 15 mins
11 of 19 people found this instruction helpful.
Was this instruction helpful to you?
Thank you for voting!

Remove the water filter to install the bypass cap

Lower the filter bottom housing to gain access to the filter. Unscrew the filter and install the bypass cap. Secure the lower filter housing to the top assembly.
  • Phil from GREENFIELD, IN
  • Difficulty Level:
    Very Easy
  • Total Repair Time:
    Less than 15 mins
  • Tools:
    Pliers
11 of 13 people found this instruction helpful.
Was this instruction helpful to you?
Thank you for voting!
Fixes Symptom 1% of time
★★★★★
★★★★★
173 Reviews

Rated by 59 customers 


Really Easy 

Less than 15 mins 

Ratings submitted by customers like you who bought this part.   

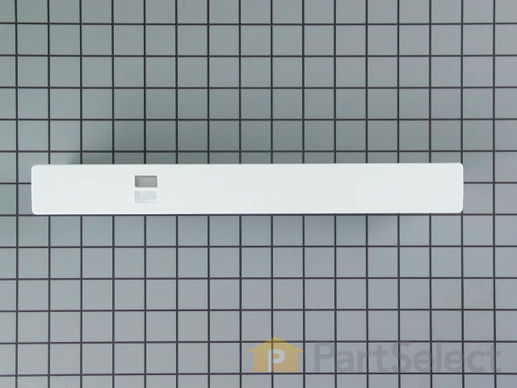
This is a center crisper rail for your refrigerator. This part acts as a support rail for the crisper drawer by holding the center of the crisper frame. You will need to replace this part is if your current drawer is not opening or closing properly. This crisper rail is white and it is made entirely of plastic. It is roughly 13.5 inches long, and 2.5 inches wide. This is an easy repair which requires no tools.

$ 50.81
  In Stock
PartSelect Number PS11757048
Manufacturer Part Number WPW10671238

Replacing your Kenmore Refrigerator Refrigerator Center Crisper Drawer Slide Rail - White

Replacing your Refrigerator Center Crisper Drawer Slide Rail - White

Customer Repair Stories

crisper drawers were off center rail due to c.r fracture

removed old rail,lifted glass panel above and inserted new rail-voila!!done.
  • albert from quakertown, PA
  • Difficulty Level:
    Really Easy
  • Total Repair Time:
    Less than 15 mins
42 of 46 people found this instruction helpful.
Was this instruction helpful to you?
Thank you for voting!

Cracked & Snapped Center Crisper Rail

A very easy fix took all of five minutes
  • Ruth from Roxbury, MA
  • Difficulty Level:
    Really Easy
  • Total Repair Time:
    Less than 15 mins
226 of 245 people found this instruction helpful.
Was this instruction helpful to you?
Thank you for voting!
Fixes Symptom 1% of time
★★★★★
★★★★★
17 Reviews

Rated by 9 customers 


Very Easy 

15 - 30 mins 

Ratings submitted by customers like you who bought this part.   

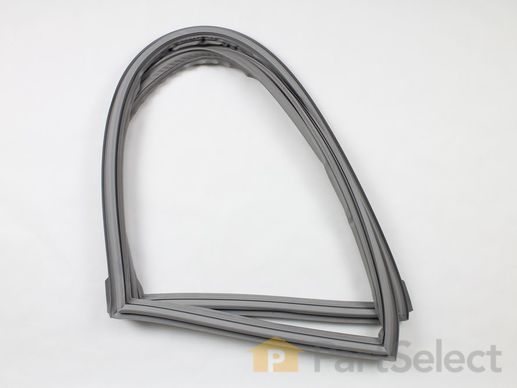
This door gasket is used to make an air-tight seal for the cabinet when the door is closed.

$ 196.78
  In Stock
PartSelect Number PS11759512
Manufacturer Part Number W10830055

Customer Repair Stories

Torn/damaged refrigerator door gaskets.

Uncurl new gaskets (set out on a table or countertop) and let them get to room temperature so they straighten out. Use hands to pull off old door gaskets. Starting at corners, use hands to push gasket into the groove on the door. Make sure gasket is properly seated all the way around the door. If some part is still wrinkled or bent, carefully use a hairdryer to heat it a bit and smooth it out.
  • Elizabeth from ALEXANDRIA, VA
  • Difficulty Level:
    Very Easy
  • Total Repair Time:
    Less than 15 mins
5 of 6 people found this instruction helpful.
Was this instruction helpful to you?
Thank you for voting!

Old refrigerator gaskets were worn out

I unboxed the replacement gasket set and inspected them for damage. Then I opened the left refrigerator door and grabbed the right hand corner of the old gasket and removed it. I then aligned the new gasket with the door and using my fingers pushed the gasket into the gasket grove. I used my thumb to seat the gasket. I repeated the process for the right door. Total time was under 15 minutes.
  • Ron from LIVERMORE, CA
  • Difficulty Level:
    Very Easy
  • Total Repair Time:
    Less than 15 mins
17 of 17 people found this instruction helpful.
Was this instruction helpful to you?
Thank you for voting!
Fixes Symptom 1% of time
★★★★★
★★★★★
1 Review

$ 15.00
  In Stock
PartSelect Number PS16620376
Manufacturer Part Number W11551552