


How Do You Test and Replace the Thermal Fuse in Your Dryer?
It's laundry day, and your clothes are queued up for a warm tumble in the dryer. But if it's not heating or even starting, a small part named the 'thermal fuse' might be to blame. Designed to prevent overheating, the thermal fuse shuts off your dryer when it becomes excessively hot. So, what is this thermal fuse, where is it hiding inside your dryer, and how can you tackle its replacement?
What is a Dryer Thermal Fuse?
Most dryers have a built-in safety feature called a thermal fuse. It is also known as a thermal cutoff or a temperature fuse. This device, usually white or silver in color, looks like a tiny rectangular piece with two wires sticking out from its body. When the dryer gets too hot, the thermal fuse “trips” or "blows," shutting the power to the heating part of the dryer so that it does not overheat. Once a thermal fuse is blown, it can't be reset or reused and must be replaced.
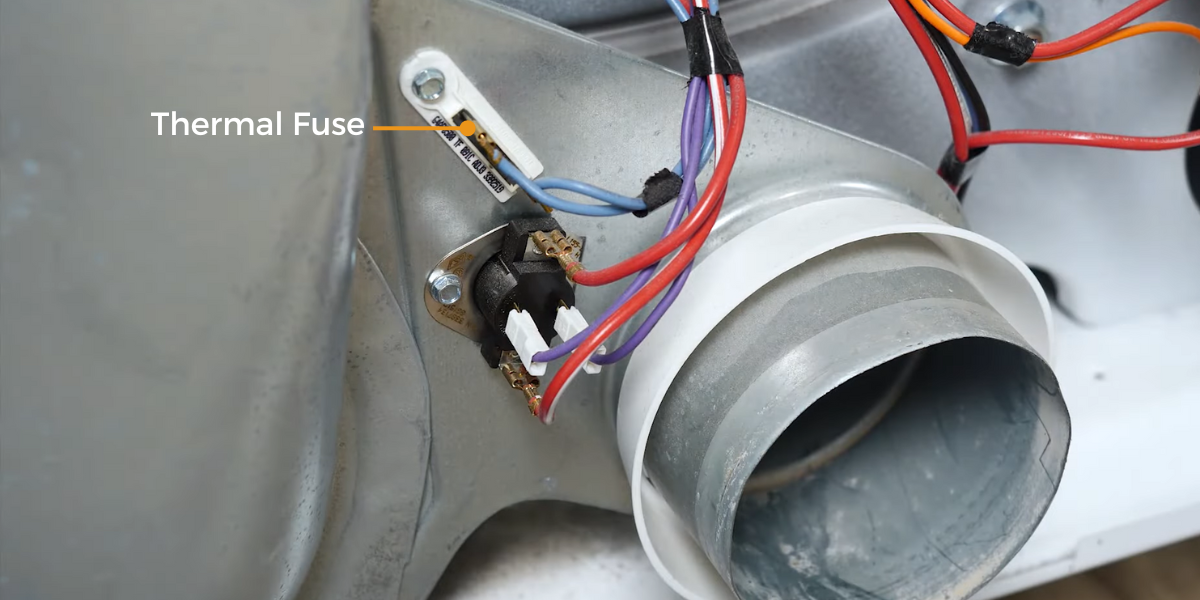
Where is the Dryer Thermal Fuse?
Regardless of whether your dryer is electric or gas-powered, you'll usually find the thermal fuse at the back or bottom of the machine. It's located close to the exhaust duct, near the heating element or burner. Take a look at the illustration below for a clearer picture. For more detailed information specific to your model, it's a smart move to consult your user manual.
How Do I Know if the Dryer Thermal Fuse is Blown?
When a thermal fuse is blown, your dryer will give you some hints:
- Your dryer may continue to spin, but it won't heat up. So, even after a full cycle, your clothes remain damp.
- Your dryer might not start up at all, even though it sounds like it's trying to.
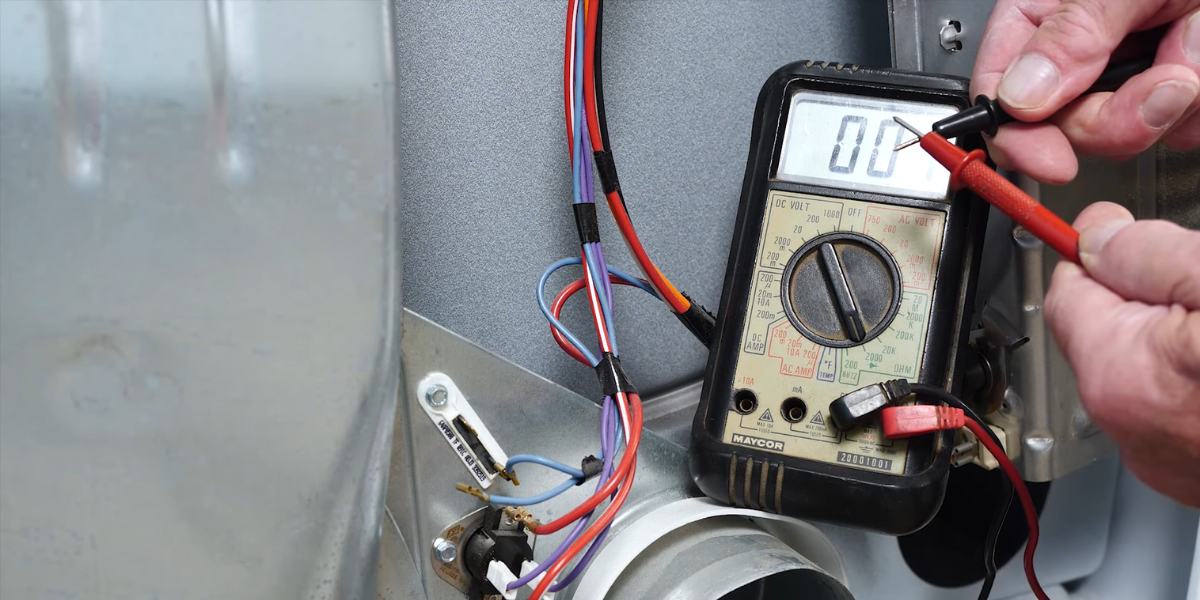
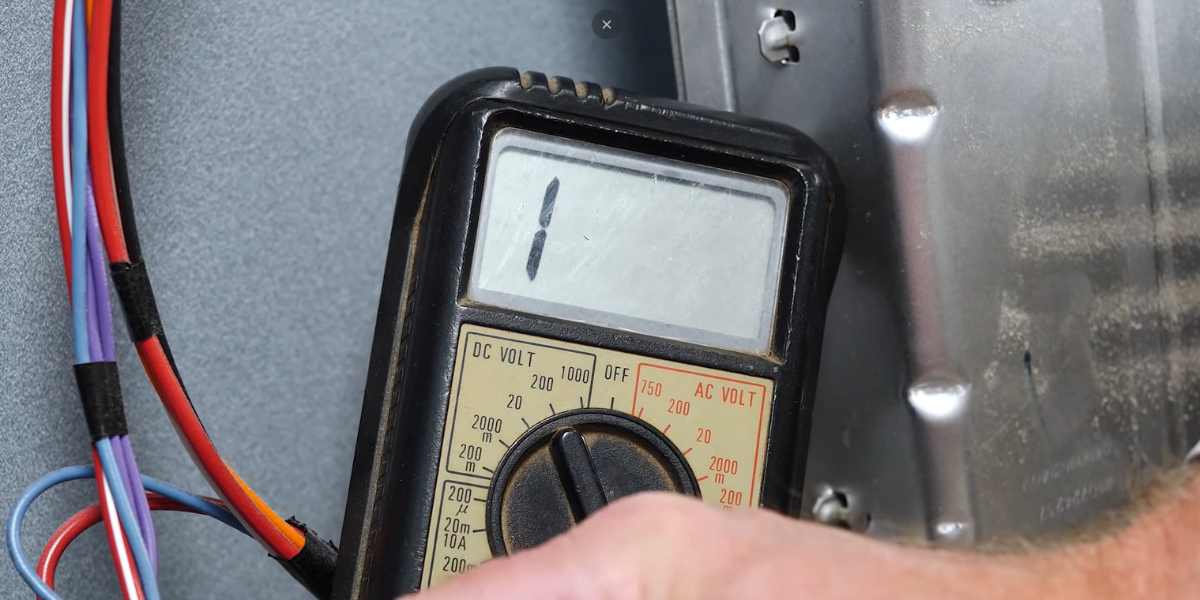
How to Test a Dryer Thermal Fuse with a Multimeter
You can use a tool called a multimeter to check the fuse:
- Step 1: Set the multimeter to the lowest setting of ohms of resistance.
- Step 2: Bring the two multimeter probes together. You should see a reading near zero.
- Step 3: Place one probe on each terminal of the thermal fuse.
- Step 4: If the multimeter doesn't beep or if it displays a reading significantly different from zero (as shown in the image below), then the fuse is likely blown.

Should I Bypass the Thermal Fuse To Use a Dryer?
A word of caution: if someone suggests you "bypass" or skip over a blown thermal fuse, please don't! Remember, the fuse is there for your safety by keeping your dryer from getting too hot and causing fires. If it's not working, replace it before you use your dryer again.
How Do I Prevent the Dryer Thermal Fuse From Blowing?
If your dryer's thermal fuse has blown, it's often a sign of another underlying problem. Before you replace the fuse, it's important to figure out and fix the root issue. If you don’t, the new fuse might just trip again soon after you replace it.
The fuse usually stops working because the exhaust vent is blocked, there's too much lint inside the dryer, or there's an issue with the heating element. Regularly cleaning and checking your dryer can help you avoid these issues.
How Do I Clean My Lint Trap?
Locate your dryer's lint trap, which is typically found at the top or front of the machine. Gently pull it out. Brush off any lint you see using your hand. Take a moment to inspect the filter for damage or holes that might allow lint to sneak into the dryer’s exhaust. If the filter seems worn or has any damage, you might want to replace it.
If the filter appears extra dirty, you can wash it with warm water and mild soap. Let it dry fully before putting it back. Don't forget to give the slot where the lint trap sits a good clean with a brush.
How Do I Clean My Dryer Vent?
Unplug your dryer and gently move it away from the wall so you can see its back. It's a good idea to wear safety glasses and maybe even a mask as some lint may fly around.
Cleaning Inside of the Dryer
With the dryer moved forward, you'll notice a hose or vent at the back. Remove this and take a look inside for any lint or other debris buildup.
Also, peek inside the dryer where the hose was attached. If you notice a lot of lint here, it might be a good idea to open up the dryer and give it a thorough cleaning with a vacuum.
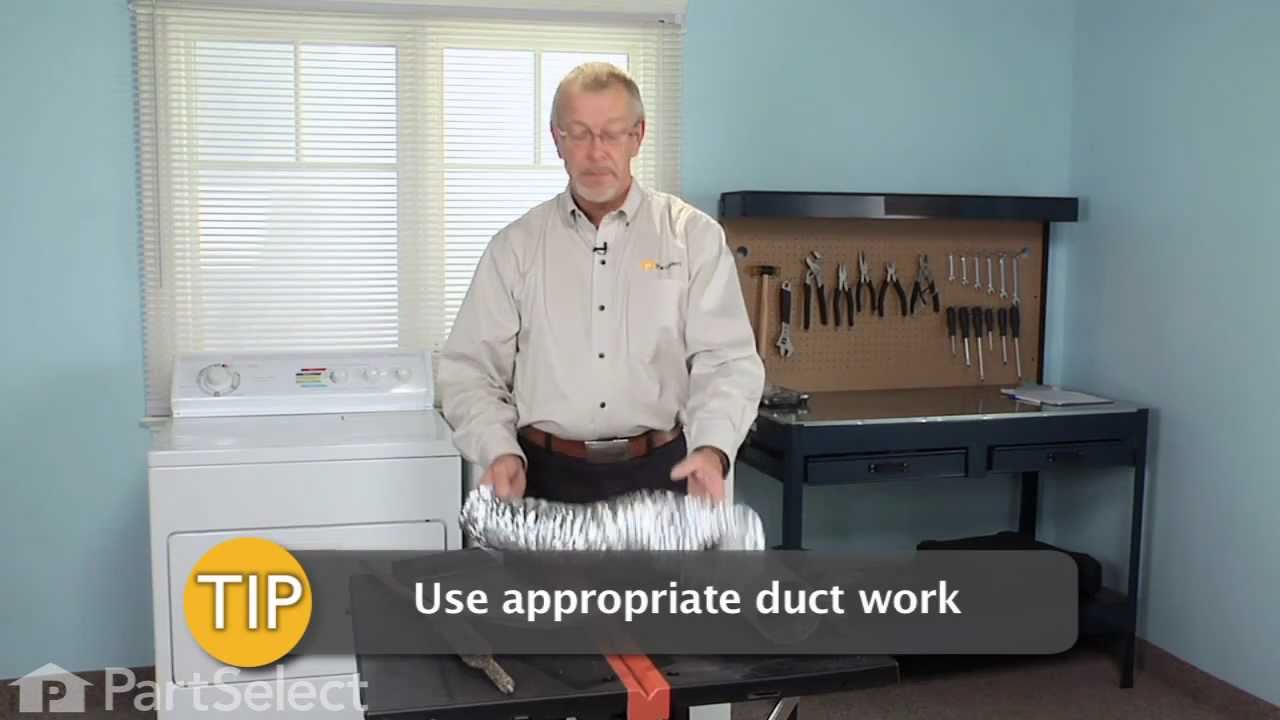
Cleaning the Dryer's External Duct
For the external ductwork that leads outdoors, you'll want to use a rotary brush (which looks a bit like those brushes you use for water bottles). You can grab one of these from most hardware stores.
Head outside to where the dryer's external vent is. You may need to take off the cover to reach inside with the brush. Some brushes can connect to a vacuum, which sucks up the lint while you brush. If you have one of these, set it up.
Push your brush in and out of the vent. If you're using a drill, make sure it's turning in the same direction the whole time. Gently move the brush back and forth inside the vent to dislodge any lint.

Where Can I Buy a Dryer Thermal Fuse?
Need a new thermal fuse for your dryer? You're in the right place! Here at PartSelect, we offer genuine replacement thermal fuses. All you need to do is search using your dryer's model number, and we'll help you find the right one. Once you've got the fuse in hand, let's install it step by step.
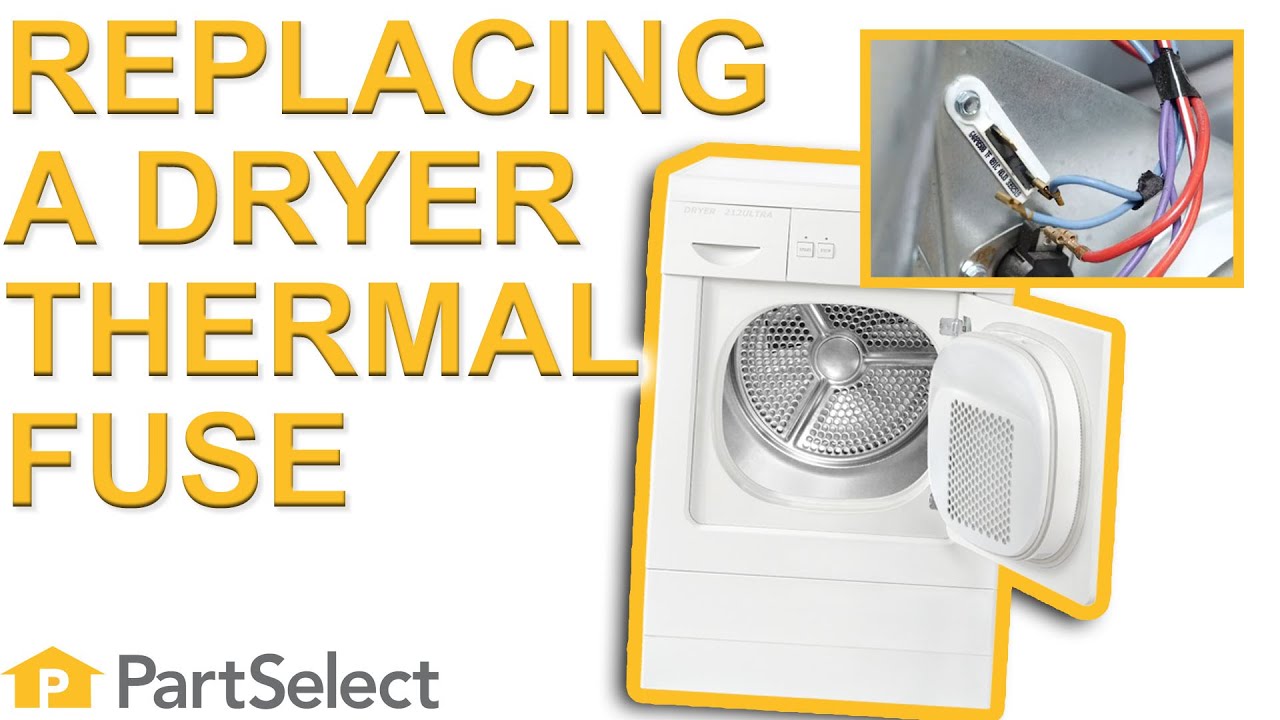
How Do I Replace the Dryer Thermal Fuse?
To replace a thermal fuse, you'll need a Phillips-head or a flathead screwdriver, and a pair of needle-nose pliers. First things first, unplug your dryer. Keep your user manual within arm’s reach, just in case you need model-specific instructions.
- Step 1: Depending on your dryer, use a screwdriver to remove the back panel or the bottom front panel.
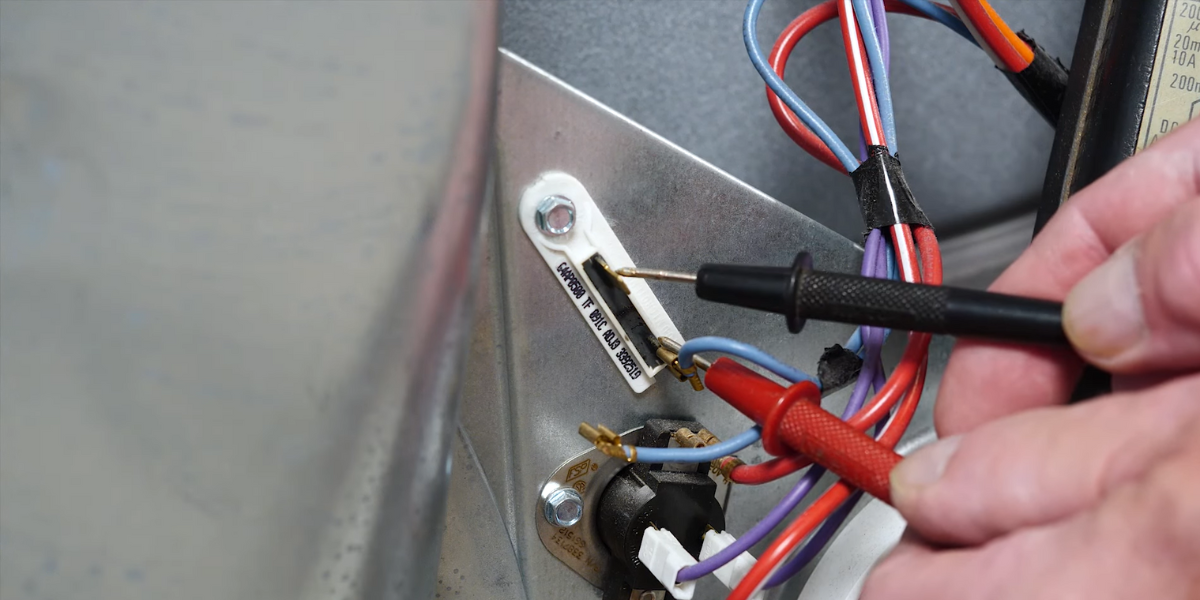
- Step 2: Search for the thermal fuse near the blower housing. If you're having a hard time spotting it, your user manual might have a diagram to help.
- Step 3: Unscrew or unclip the faulty fuse and disconnect the wires from the old fuse using needle-nose pliers, making a note or even a quick photo with your phone so you remember where they go.
- Step 4: Hook the wires up to your new fuse, ensuring they're connected the same way as before. Then, put the fuse where the old one was, using the screw or clip to secure it.
- Step 5: Put the panel you removed back in place and plug your dryer in. Before running a full cycle, test your dryer by turning it on for a minute to make sure it warms up.
And there you have it! The ABCs of locating and replacing a dryer's thermal fuse. Even if you've never thought of yourself as the "handy" type, with a little patience and care, this is a task you can totally tackle.

These top tips will ensure your dryer is running as efficiently as possible...

Your dryer vents need to be cleaned at least once a year. Use this step-by-...

Get that old lint out, and get your clothes feeling fresher than ever with ...
